Building a rearrangable TreeListViewMaking TreeListViews into a drag |
Building a rearrangable TreeListView
2011-05-02
Everyone loves the TreeListView. It looks nice, and for a certain class of problem, it provides an elegant solution. It can be a little tricky to get it working in the first place, but once you have the knack, they are really quite simple.
Once a TreeListView is working, the first request users will make is to make it rearrangeable – drag this branch or row to somewhere else. ObjectListView has some nice support for drag and drop operations, and so it should be easy to do that. But it isn’t – or at least, doesn’t seem to be, judging from the number of emails and messages I receive about that topic.
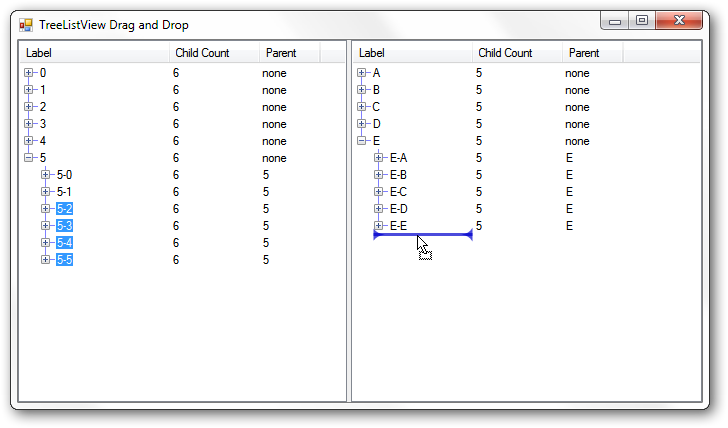
So I decided to build one from scratch to see exactly what needs to be done to make it work. The goal I want to reach is to have two TreeListViews where branches can be rearranged within the same tree or dragged between trees.
Update April 2012: I have added code to show how to handle CanDrop and Dropped events from non-ObjectListView sources. In this example, we can accept drops from a RichTextBox (actually, it works for any other source of text).
You can download the source code from here.
Dumb models
All of ObjectListView’s controls revolve around model objects. So, to make a working TreeListView, we need a model for it to display:
public class ModelWithChildren {
    public int ChildCount { get { ... } }
    public List<ModelWithChildren> Children { get { ... } }
    public string Label { get; set; }
    public ModelWithChildren Parent { get; set; }
    public string ParentLabel { get { ... } }
}
The exact implementation isn’t important. It’s enough that the model supports these properties, so that they can be displayed in the UI.
Making a empty TreeListViews
Before we can rearrange the tree, we need it to be working. [For those familiar with ObjectListView development, this is all obvious, but I’ll include it for newcomers]:
- Create a new WinForms project. I called mine TreeListViewDragDrop.
- Add the ObjectListView project to your new solution. You could just reference the ObjectListView.dll, but if you reference the project, the Toolbox is automatically populated with the controls, and you can step into the ObjectListView source code.
- In the TreeListViewDragDrop project, add a reference to the ObjectListView project.
- Build the solution.
- Open Form1 in the Designer. In the Toolbox, you can now see all the ObjectListView controls, including TreeListView.
- Put a SplitContainer onto the Form. Set the Dock property to be Fill, so that it expands to fill the whole form.
- On each side of the splitter, drag a TreeListView from the Toolbox. Give each TreeListView a name you like.
- On each TreeListView, create three columns that will display Label, ParentLabel and ChildCount properties respectively. Make the width of each about 120 pixels.
- Create an ImageList with an image size 16x16. Set the SmallImageList of both TreeListViews to this image list.
- Build the solution.
NOTE: Giving a SmallImageList to each TreeListView is very important. If you don’t do this, the hit testing on the tree will not work correctly. The image list doesn’t need any images – it just needs to exist.
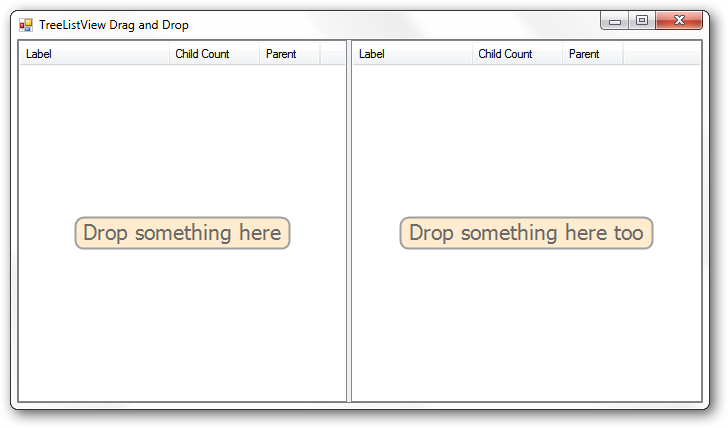
It still does nothing, but it should looks something like this.
Making the TreeListViews work
To become a fully working TreeListView, the control need three more things:
- A way to know if a particular model can be expanded
- When a model is expanded, the control needs a way to know what model objects should appear as its children.
- The list of models that appear at the very top level of the control (the Roots).
The first two we solve by installing delegates:
// Configure the first tree
treeListView1.CanExpandGetter = delegate(object x) { return true; };
treeListView1.ChildrenGetter = delegate(object x) { return ((ModelWithChildren)x).Children; };

// Configure the second tree
treeListView2.CanExpandGetter = delegate(object x) { return true; };
treeListView2.ChildrenGetter = delegate(object x) { return ((ModelWithChildren)x).Children; };
This says all rows can be expanded, and when a row is expanded, it should show the contents of the Children property.
The final step is to give both trees a list of root objects:
treeListView1.Roots = ModelWithChildren.CreateModels(null, new ArrayList { 0, 1, 2, 3, 4, 5 });
treeListView2.Roots = ModelWithChildren.CreateModels(null, new ArrayList { "A", "B ", "C", "D", "E" });
ModelWithChildren.CreateModels is a silly method that simply generates a list of ModelWithChildren objects that we can use in our trees.
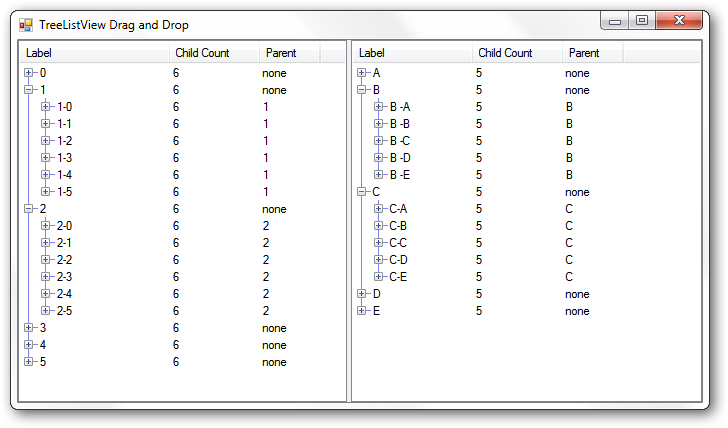
With these delegates in place and a list of roots assigned, our form now has two fully functional TreeListViews:
Adding drag and drop
OK. We now have two functioning TreeListViews but what we really wanted was drag and drop. Let’s do that bit now.
ObjectListView has good support for drag and drop. In its simplest form, you can make an ObjectListView support dragging from it by setting IsSimpleDropSource to true, and make it support dragging to it by setting IsSimpleDropSink to true. Both these properties can be set in the Form Designer.
If you set both these properties to true and run the solution again, you will be able to drag rows, but you will not be able to drop them anywhere.
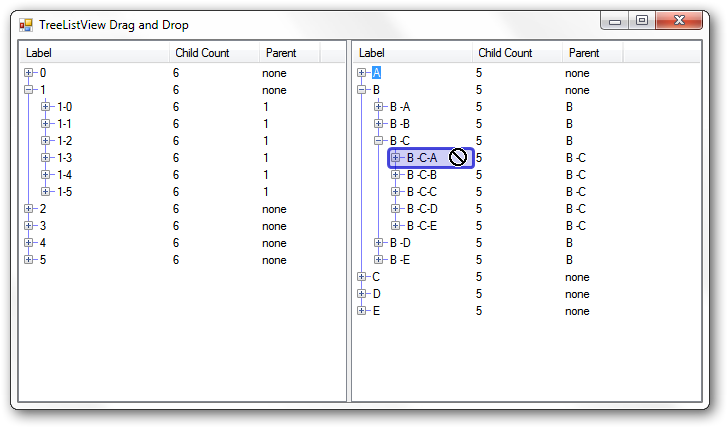
Here I was dragging the “A” row onto the “B-C-A” row. You can see the automatic target highlighting that ObjectListView does for you. But you can also see that we can’t drop it there.
Configuring what happens during drag
Automatic target highlighting is one of the features that ObjectListView provides. Other abilities can be enabled or configured by changing the settings on the IDropSink object that actually handles the dragging.
When you set IsSimpleDropSink to true, ObjectListView creates a SimpleDropSink object for you, and gives it a useful default configuration. But you can change it so it does other things:
SimpleDropSink sink1 = (SimpleDropSink)treeListView1.DropSink;
sink1.AcceptExternal = true;
sink1.CanDropBetween = true;
sink1.CanDropOnBackground = true;
Here, we’re telling the drop sink to:
- accept drops from other controls;
- to allow items to be dropped between rows;
- to allow drops on the background of the control.
You could also allow dropping on subitems, change the colouring of the target highlighting, or even tweak how information message were presented to the user. Knock yourself out :)
Handling the drag
Let’s handle drags that come from the other TreeListView first.
To tell the control that it’s OK for a drop to happen, you have to listen for the ModelCanDrop event. Something like this:
private void HandleModelCanDrop(object sender, BrightIdeasSoftware.ModelDropEventArgs e) {
    e.Handled = true;
    e.Effect = DragDropEffects.None;
    if (e.SourceModels.Contains(e.TargetModel))
        e.InfoMessage = "Cannot drop on self";
    else {
        var sourceModels = e.SourceModels.Cast<ModelWithChildren>();
        ModelWithChildren target = e.TargetModel as ModelWithChildren;
        if (sourceModels.Any(x => target.IsAncestor(x)))
            e.InfoMessage = "Cannot drop on descendant (think of the temporal paradoxes!)";
        else
            e.Effect = DragDropEffects.Move;
    }
}
In this handler, the principal property we want to set is ModelDropEventArgs.Effect. If this is None, the user will not be able to drop at the current location. Above, we check that the user is not trying to drop something onto itself:
if (e.SourceModels.Contains(e.TargetModel))
   e.InfoMessage = "Cannot drop on self";
We also want to prevent the user from dropping something onto one of its descendents:
if (sourceModels.Any(x => target.IsAncestor(x)))
   e.InfoMessage = "Cannot drop on descendant (think of the temporal paradoxes!)";
If something is not right, we set the InfoMessage to give the user a nice explanation of why they can’t drop at the current location.
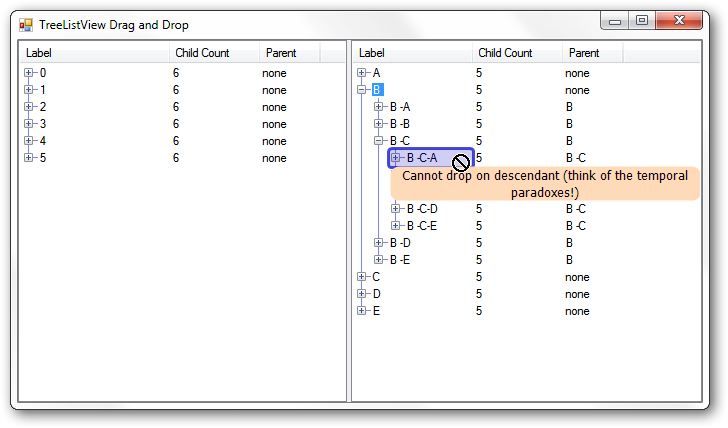
However, if everything is OK, we allow the user to do a drop:
e.Effect = DragDropEffects.Move;
The ModelDropEventArgs has lots of information. Some of its crucial properties are:
| Property | In/Out | Description |
|---|---|---|
| SourceModels | In | The models that are being dragged |
| TargetModel | In | The model that is under the cursor. null if there is no row under the cursor. |
| ListView | In | The ObjectListView that is under the cursor |
| SourceListView | In | The ObjectListView where the drag started |
| DropTargetLocation | In | What is the current drop target? Key values are Item and Background. |
| InfoMessage | Out | An information message that will be shown to the user in a floating text tip. |
| Effect | Out | What action will be taken if the user releases the mouse button? |
Handling the drop
Once we listen for the ModelCanDrop event, the user will be able to drag and drop rows, but the drop will still do nothing! To make something happen when the user drops something, we have to listen to the ModelDropped event. In that handler, we make the changes to our model that will make the users drag-drop action actually do something:
private void HandleModelDropped(object sender, BrightIdeasSoftware.ModelDropEventArgs e) {
    switch (e.DropTargetLocation) {
        case DropTargetLocation.Background:
            MoveObjectsToRoots(
                e.ListView as TreeListView,
                e.SourceListView as TreeListView,
                e.SourceModels);
            break;
        case DropTargetLocation.Item:
            MoveObjectsToChildren(
                e.ListView as TreeListView,
                e.SourceListView as TreeListView,
                (ModelWithChildren)e.TargetModel,
                e.SourceModels);
            break;
        default:
            return;
    }

    e.RefreshObjects();
}
This looks more daunting than it really is. Basically, if the user has dropped the rows onto the background, we are going to make all the dropped objects into roots. If the user has dropped the model onto another model, then all the dropped models are going to become children of the target model. Once we have made all our changes to the model, we call e.RefreshObjects() to redraw the controls.
In general, in the drop handler, you must update your model objects, make any changes to Roots property, and call RefreshObjects().
You must update your model objects first. Until that is done, TreeListView doesn’t have a chance of updating itself. You must also tell TreeListView about changes to the Roots of the control. TreeListView can work out many changes for itself, using the CanExpand and ChildrenGetter delegates. But it cannot work out changes to the Roots collection. If you want to add a new root or remove an existing root, you must tell TreeListView about the change. You can do this by setting the Roots property, or by calling the AddObject() or RemoveObject(), but you must let the TreeListView know that the roots have changed.
To summarize: when handling a ModelDropped event, you should:
- Update your model
- Tell TreeListView about changes to Roots
- Call e.RefreshObjects();
Let’s first deal with the case of making the dragged objects into the children of the drop target:
private void MoveObjectsToChildren(TreeListView targetTree, TreeListView sourceTree, ModelWithChildren target, IList toMove) {
    foreach (ModelWithChildren x in toMove) {
        if (x.Parent == null)
            sourceTree.RemoveObject(x);
        else
            x.Parent.Children.Remove(x);
        x.Parent = target;
        target.Children.Add(x);
    }
}
Most of this is just keeping our model up-to-date. In your application, all of that code would be completely different. The only interaction with the TreeListView is that objects that used to be roots must be explicitly removed (via RemoveObjects()) since they are now going to be children of the target node.
Making the dragged objects into roots is just as simple:
private static void MoveObjectsToRoots(TreeListView targetTree, TreeListView sourceTree, IList toMove) {
    foreach (ModelWithChildren x in toMove) {
        if (x.Parent != null) {
            x.Parent.Children.Remove(x);
            x.Parent = null;
            sourceTree.AddObject(x);
        }
    }
}
Again, the bulk of this is just keep our model up-to-date. The only thing we have to do is tell the TreeListView about any new root objects, via AddObject().
Rearranging the branches
(Deep breath) We now have two fully functional TreeListViews that support dragging branches to make them into roots or children of another branch.
The final piece of the exercise is to allow the user to rearrange the branches. That is, to drag one or more branches and drop them before or after another branch, and have them become siblings of that branch.
In the code that follows, what is important is the interactions with the TreeListViews. There are some bits of code that are a little tricky but they are mainly about how I make the rearranging work in my silly model classes. What you will need to do in your application to implement rearranging will be completely different. But your interactions with the TreeListView will be the same:
- Update your mode
- Tell TreeListView about changes to Roots
- Call e.RefreshObjects();
- All done
Rearranging - Make it so
To make rearranging work, the existing ModelCanDrop will suffice as is – we only need to update our ModelDropped handler to deal with the “dropped between rows” cases:
private void HandleModelDropped(object sender, BrightIdeasSoftware.ModelDropEventArgs e) {
    switch (e.DropTargetLocation) {
        case DropTargetLocation.AboveItem:
            MoveObjectsToSibling(
                e.ListView as TreeListView,
                e.SourceListView as TreeListView,
                (ModelWithChildren)e.TargetModel,
                e.SourceModels,
                0);
            break;
        case DropTargetLocation.BelowItem:
            MoveObjectsToSibling(
                e.ListView as TreeListView,
                e.SourceListView as TreeListView,
                (ModelWithChildren)e.TargetModel,
                e.SourceModels,
                1);
            break;
        case DropTargetLocation.Background:
            MoveObjectsToRoots(
                e.ListView as TreeListView,
                e.SourceListView as TreeListView,
                e.SourceModels);
            break;
        case DropTargetLocation.Item:
            MoveObjectsToChildren(
                e.ListView as TreeListView,
                e.SourceListView as TreeListView,
                (ModelWithChildren)e.TargetModel,
                e.SourceModels);
            break;
        default:
            return;
    }

    e.RefreshObjects();
}
The new cases in the switch statement are DropTargetLocation.AboveItem and DropTargetLocation.BelowItem. These values indicate that the user is trying to move a model to just before (or just after) the target.
The real work is done in MoveObjectsToSibling:
private void MoveObjectsToSibling(TreeListView targetTree, TreeListView sourceTree, ModelWithChildren target, IList toMove, int siblingOffset) {
    // There are lots of things to get right here:
    // - sourceTree and targetTree may be the same
    // - target may be a root (which means that all moved objects will also become roots)
    // - one or more moved objects may be roots (which means the roots of the sourceTree will change)

    ArrayList sourceRoots = sourceTree.Roots as ArrayList;
    ArrayList targetRoots = targetTree == sourceTree ? sourceRoots : targetTree.Roots as ArrayList;

    // We want to make the moved objects to be siblings of the target. So, we have to
    // remove the moved objects from their old parent and give them the same parent as the target.
    // If the target is a root, then the moved objects have to become roots too.
    foreach (ModelWithChildren x in toMove) {
        if (x.Parent == null)
            sourceRoots.Remove(x);
        else
            x.Parent.Children.Remove(x);
        x.Parent = target.Parent;
    }

    // Now add to the moved objects to children of their parent (or to the roots collection
    // if the target is a root)
    if (target.Parent == null) {
        targetRoots.InsertRange(targetRoots.IndexOf(target) + siblingOffset, toMove);
    } else {
        target.Parent.Children.InsertRange(target.Parent.Children.IndexOf(target) + siblingOffset, toMove.Cast<ModelWithChildren>());
    }
    if (targetTree == sourceTree) {
        sourceTree.Roots = sourceRoots;
    } else {
        sourceTree.Roots = sourceRoots;
        targetTree.Roots = targetRoots;
    }
}
Again, most of this code is just to implement the rearranging within my model objects. Your code will be different. But your interactions with TreeListView will be the same. I’ll repeat it one last time:
- Update your model
- Maintain the Roots property
- Call e.RefreshObjects() when you are done.
All done
With this code, you now have a fully-functional TreeListView that allows its rows to be rearranged.
You can download final source code from here.